- Download the Nano Server Image Builder at Microsoft’s website (Download Center) by clicking the Download button.
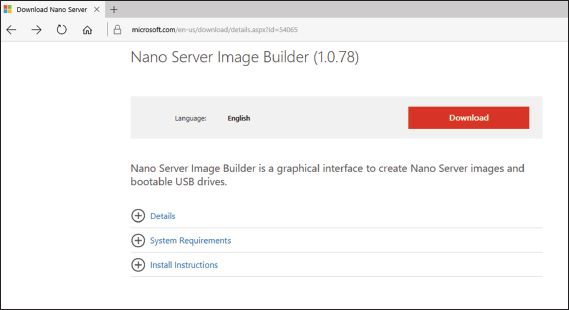
Nano Server Image Builder - A file named
NanoServerImageBuilder.msiwill be created. Double-click on the file. If an Open File Security Warning Dialog box appears, click the Run button. - The Nano Server Image Builder Setup wizard will begin. Click Next at the intro screen.
- At the Licensing screen, click the I accept the terms checkbox and click Next.
- At the Destination Folder screen, choose the directory where you want to install the Nano Server Image Builder files . Click Next.
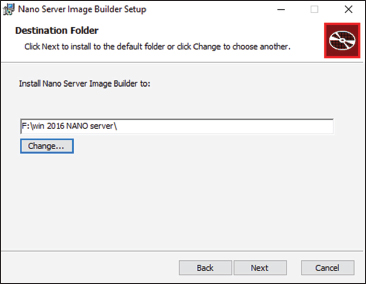
Nano Server Image Builder Destination - At the Ready to Install screen, click the Install Button. If a User Account Control box appears, click the Yes button.
- Once the Installation is complete, click the Finish Button.
- Open Windows Explorer and go to the destination folder that you chose in step 5. Double-click the
NanoServerImageBuilder.exefile. If a UAC dialog box appears, click Yes. - For the Image Builder to work, you must also download the Windows ADK kit. This can be done at Hardware Dev Center. Click the get Windows ADK Download button.
- It will ask you if you want to run or save the file. I saved the file to the same destination folder as the Nano Server Image Builder. Once it’s downloaded, double-click the
adksetup.exefile. If a dialog box appears, click Run. - Specify the destination of where you want the Windows ADK files to install and click Next.
- At the Windows Kit Privacy screen, you can choose either option. By choosing Yes, you will participate in Microsoft’s feedback program. For this exercise, I chose No. Click Next.
- At the License Agreement screen, click Accept.
- At the Features screen, accept the defaults and click Install. If a UAC screen appears, click Yes.
- After the installation is complete, click the Close button.
- Double-click on the
NanoServerImageBuilder.exefile. When the UAC screen appears, click Yes. - So we now have the ability to create a Nano Server image or a bootable USB. We are going to create an Image. So click on the top choice “Create a new Nano Server image” .
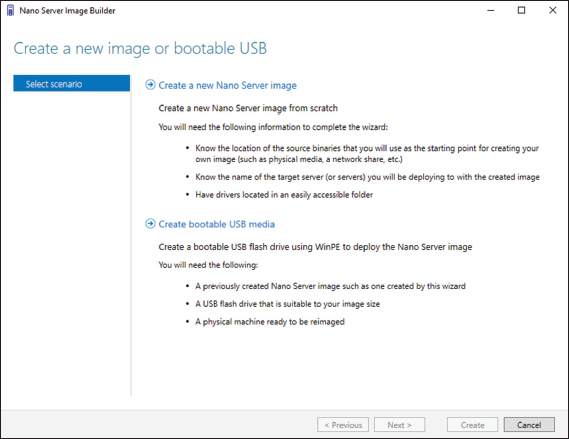
Nano Server Image Choice - At the Before you begin screen, click Next.
- At the Select Installation Media screen, point the folder to your Windows Server 2016 installation files where the NanoServer Folder resides. Click Next.
- At the License agreement screen, click the box that states I have read and agree to the terms. Then click Next.
- At the Deployment type screen. I am going to choose to create a Virtual machine image . I am keeping the default of 8 GB and I am placing the VHD in my Win 2016 Nano Server folder . Click Next.
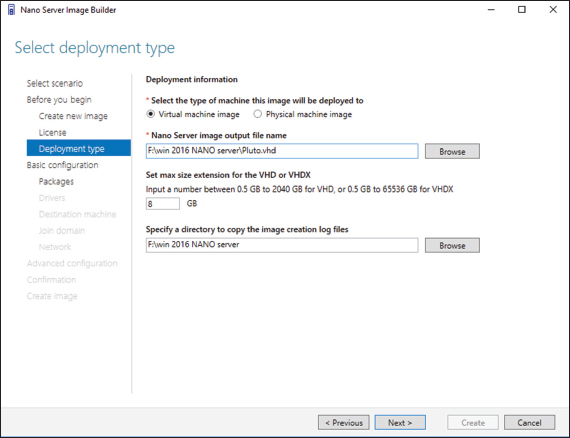
Deployment Type - At the Basic Installation screen, click Next.
- At the Select Optional Packages screen, you can choose any other options you want to install like DNS, IIS, etc. I am just going to click Next.
- At the Drivers screen, add any drivers that may be needed for your installation and click Next.
- Next the Destination screen will appear. Here is where you will enter the name of the computer and the Administrator’s password. Make sure your Time Zone is correct and click Next.
- At this time, I am not going to join a domain. So I am just going to click Next.
- I will leave the default network settings and click Next.
- At the Advanced Configuration Screen, I am going to choose the top option “Create a Basic Nano Server Image”
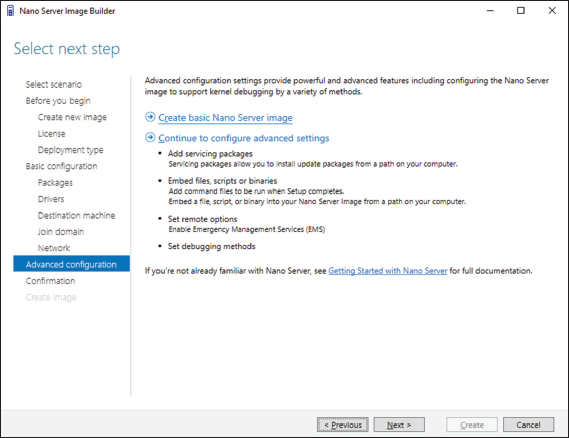
Advanced Configuration Screen - After you click the link, it will automatically take you to a Confirmation screen. Just click the Create button.
- Once the image is complete, click the Close button.
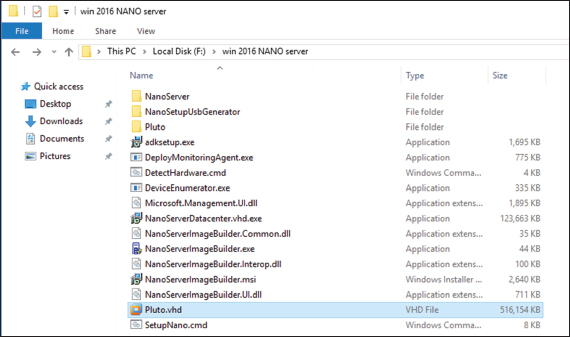
- Open Windows Explorer and go to the folder where you created the VHD (see Figure 1.16). Make sure the VHD (My VHD is named Pluto.vhd) has been created. You can now run this VHD in Microsoft Hyper-V.
Total Pageviews
Showing posts with label nano server instalation. Show all posts
Showing posts with label nano server instalation. Show all posts
Tuesday, March 3, 2020
Installing Nano Server Step by Step
Subscribe to:
Comments (Atom)
Azure Pricing
Azure offers pay-as-you-go and reserved instances for pricing. Azure Pricing Factors: Resource size and resource type. Different Azure loc...
-
Configure RAID 5 on Dell T320 Server with 3 hard disks 1) Go to the raid configuration utility first (Ctrl + R). You can see the butto...
-
Configure RAID 5 on Dell T320 Server with 3 hard disks 1) Go to the raid configuration utility first (Ctrl + R). You can see the butto...
-
Unlocking Your Bootloader First manually enable OEM unlocking in Developer options in order to allow the bootloader to be unlocked Logi...

